Workflows
In Zynk a Workflow is a collection of Tasks or "actions", that when ran together can be used to automate your business processes. Once configured a workflow can either be ran on demand through Zynk, or setup using Windows Schedule Tasks to run on regular basis. Each workflow can consist of up to 20 tasks, so some processes may need to be split up over multiple workflows.
For information on how to create workflows using Zynk, see Creating New Workflows
Tasks
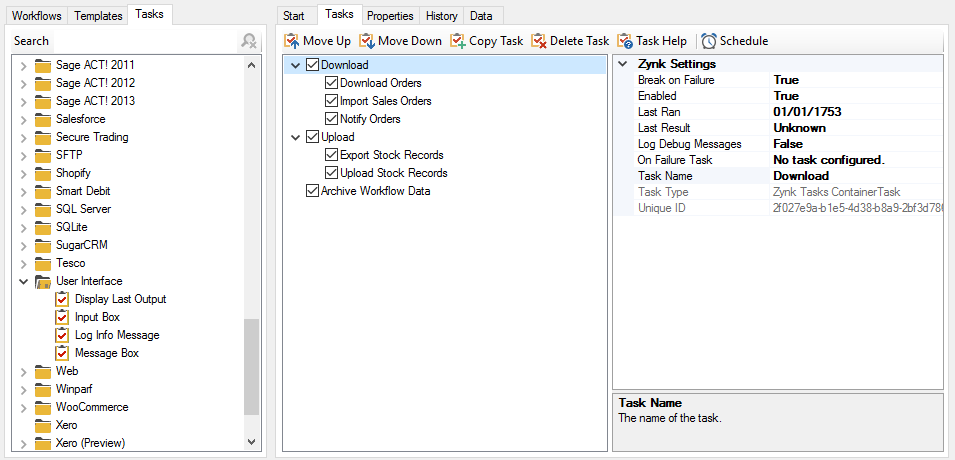
You build up the structure of the workflow by adding tasks from the Task Library, these are added to the current workflows Task List. The example below shows an example workflow that could be used to download orders from a website, convert the data into the required format, import the data as invoices in Sage, and finally email the customers their invoice. You can edit the settings for each task using the grid on the right of Zynk.
Properties
Each workflow has a set of properties which can be configured on the 'Properties' tab.
Email Workflow Report
Required
Zynk can email a workflow report after running, which details the tasks that ran and any messages logged. The options available are:-
- Never (default) - will never send any report emails
- Always - will always send a report regardless if the workflow was successful or not
- OnFailure - will only send a report if one of the tasks fails (and break of fail for that task is true)
- OnErrorFlag - will only send a report if the Set Error Flag has been used in the workflow, allowing for finer control of error handling
Email Workflow Report To
Optional
The email address(es) to send the workflow reports to.
Include Workflow Log
Required
Choose when the log messages should be included in the report.
Description
Optional
You can enter a brief description of the workflow's functions here.
History House Keeping
Required
Settings to control how long entries in the workflow history should be kept. The default setting is 90 days.
Type
Required
Select the type of house keeping to perform. The options available are:
- NotEnabled - Do not perform any house keeping of the archives. All archives will be kept indefinitely.
- NumberOfArchives - Keep the specified number of archives.
- NumberOfDays - Keep archives the specified number of days.
Number
Required
Used to set either the number of days to keep archives for, or the total number of archives to store, depending on the Type setting.
Id
Read Only
The workflow's unique identification number.
Last Ran
Required
The date the workflow was last ran.
Last Result
Required
The result when the workflow was last ran.
Name
Read Only
The name of the workflow. To rename a workflow, right click on the workflow in the 'Workflows' tab, and click 'Rename'.
Resume Workflow on Failure
Required
Set this to true to allow the workflow to resume from the last failed task. This means that the workflow will pick up from where it left off in the event of a task failing. This setting defaults to true.
This will only apply to tasks where the Common Task Settings setting is true.
If set to false, the workflow will always start from the beginning regardless of the outcome of the previous run.
Show Help On Startup
Required
Set to true to display the documentation when the workflow is opened.
Use Mutex
Required
Set to true to prevent more than one copy of the workflow running simultaneously.
Variables
Required
The list of workflow variables. See Variables for more information.
Version
Read Only
The version of Zynk which last saved the workflow.
Typical Use Cases
Two of the most common use cases for workflows are to download data from an e-commerce website and import in into Sage, or export data from Sage and upload it to an e-commerce website. See below for an overview of how this can be achieved.
Download from website to Sage
- Download the required data from the website using the appropriate task. For example, this may be the Export Orders from Magento task.
- Transform the data to the Zynk format. This can be done using the XSLT Transform.
- Import the data into Sage using the appropriate task. For example, this may be the Importing Sales Orders into Sage 50 UK task.
Upload from Sage to website
- Export the required data from Sage using the appropriate task. For example, this may be the Exporting Stock Records from Sage 50 UK task.
- Transform the data to the website's format. This can be done using the XSLT Transform.
- Upload the data to the website using the appropriate task. For example, this may be the Import Inventory Updates in Magento task.
Creating New Workflows
To create a new Workflow, click on the File > New menu or the New Workflow toolbar button, when you create a new Workflow, the Task Library pane is automatically selected so you can begin creating your workflow.
Once you have created the Workflow, choose the Tasks from the Task Library and drag and drop them into the Workflow builder to create your Workflow.
Deleting a Workflow
To delete a Workflow, choose the Workflow from the Workflows pane and choose Edit > Delete Workflow. You will be asked to confirm the deletion.
Once a Workflow has been deleted you cannot recover it unless you have a backup.
Running a Workflow
To Run a Workflow, first ensure you have a workflow loaded. If you do not have a workflow loaded the 'Run' option is disabled.
Click on the Run button, the Output pane will be displayed once the workflow starts and you should be able to follow the progress on the progress bar at the bottom of the screen.
Once the workflow has completed, the Output pane should say Workflow Completed. If any errors have occurred they will be displayed in the Errors pane and will display the number of errors that have occurred e.g. Errors(2).
Running a Workflow from the Command Prompt
You can easily start a Workflow without launching the Zynk user interface, using the Command Prompt.
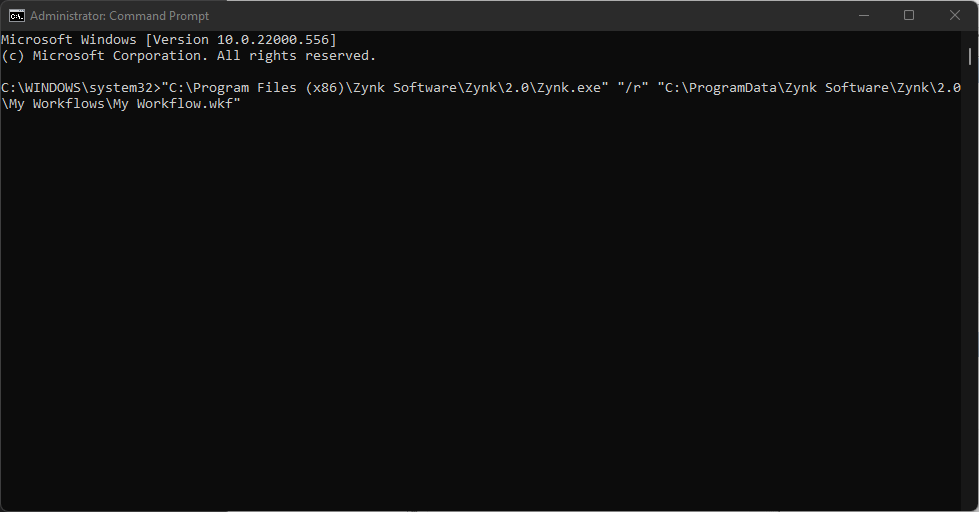
Type the path to the Zynk executable file (Zynk.exe) (if you are typing this command from outside of the Zynk install folder you will have to provide the full path to the Zynk application) followed by "/r" followed by the full path to the Workflow you would like to run.
Examples
Zynk V1 - "c:\Program Files\Internetware\Zynk\Zynk.exe" "/r" "c:\ProgramData\Internetware\Zynk\1.0\My Workflows\
Zynk V2 - "c:\Program Files (x86)\Zynk Software\Zynk\2.0\Zynk.exe" "/r" "c:\ProgramData\Zynk Software\Zynk\2.0\My Workflows\
Zynk V3 - "c:\Program Files (x86)\Zynk Software\Zynk\3.0\Zynk.exe" "/r" "c:\ProgramData\Zynk Software\Zynk\3.0\Workflows\
Stopping a Workflow
To stop a workflow that is currently running click on the Stop Workflow button on the main toolbar.
Please note that some tasks cannot be stopped whilst they are running (for example where it is executing a query on a remote server). When this is the case, the workflow will stop once the currently running task has finished.
Moving Workflows Between Computers
Zynk provides functions to import and export workflows and their data using a single workflow package file, which can easily be moved from one PC and another. For example, you may need to move a workflow when deploying an integration to a live environment.
The following data is included in a workflow package:
- The workflow file (.wkf),
- Data contained in the workflow's working directory (and it's sub directories),
- Any connections used by the tasks in the workflow,
- Any XSL transform files used by Auto Mapper tasks in the workflow,
- Any global variables referenced in settings of the tasks in the workflow.
It does not include the following:
- The workflow backup file (.bak),
- Any data files used by the workflow which aren't stored in the working directory,
- The logs for the workflow as seen in the History tab,
- Any truth table data as seen on the Data tab,
- Any data archived by the Archive Workflow Data task (even if it is stored in the workflow's working directory).
Exporting A Workflow
To export a workflow, first find the workflow you want to export in the Workflows tab in Zynk. Right click on the workflow and click 'Export'. You will see a screen like the one shown below:
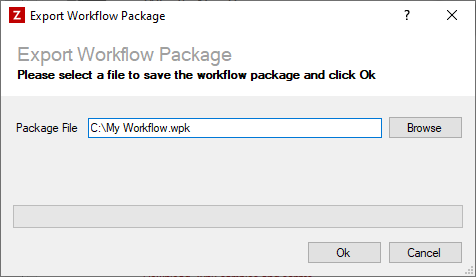
- Enter file to save the workflow package to, or use the Browse button to select this.
- Click the Ok button to start the export.
- Once the export is complete, a confirmation message will be displayed.
Importing A Workflow
To import a workflow, first find the folder you want to add the workflow in the Workflows tab in Zynk. Right click on the folder and click 'Import'. Alternatively, you can also double click on the workflow package file within Windows Explorer. You will see a screen like the one shown below:
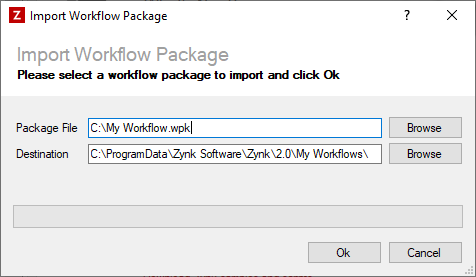
- Either type in the path to the workflow package file you want to import, or use the Browse button to select it from the file system.
- If required, you can change the destination folder the workflow will be imported into. Either type the path into the destination box, or use the browse button to select it from the file system. Please note that the destination must be either the 'Workflows' folder, or one of it's sub folders. By default, the destination will be set to the 'Workflows' folder.
- Click the Ok button to start the import. Please note that if a connection contained in the workflow package file already exists, it will be overwritten automatically without warning.
- Once the import is complete, a confirmation message will be displayed.
Restoring a Workflow
Occasionally, a workflow can become corrupted. This is most commonly caused when the machine running Zynk loses power or runs out of space midway through a workflow run, making it unable to write the workflow back to disk at the end of the run.
Because this is often an unexpected event, Zynk will automatically create a backup copy of your most recent successful run that can be restored should it be needed.
To restore the backup copy of your workflow:
- In Zynk, right click on the workflow that has become corrupted and choose "Open File Location"
- Locate the 2 files that share the name of the workflow.
- Rename the file that ends with .wkf to .old.
- Rename the file that ends with .bak to .wkf.
- Close and reopen Zynk.
This should allow the workflow to now be opened and resume at it's next scheduled run time.
Submitting a Workflow
Submitting a workflow can be useful if you need to get support with a specific issue or if you are requesting changes to your current integration.
Depending on your version this can be done in one of two ways, detailed below.
To find your current version, click Help -> About on the menu bar at the top of the program
Version 2.22.5 and Below
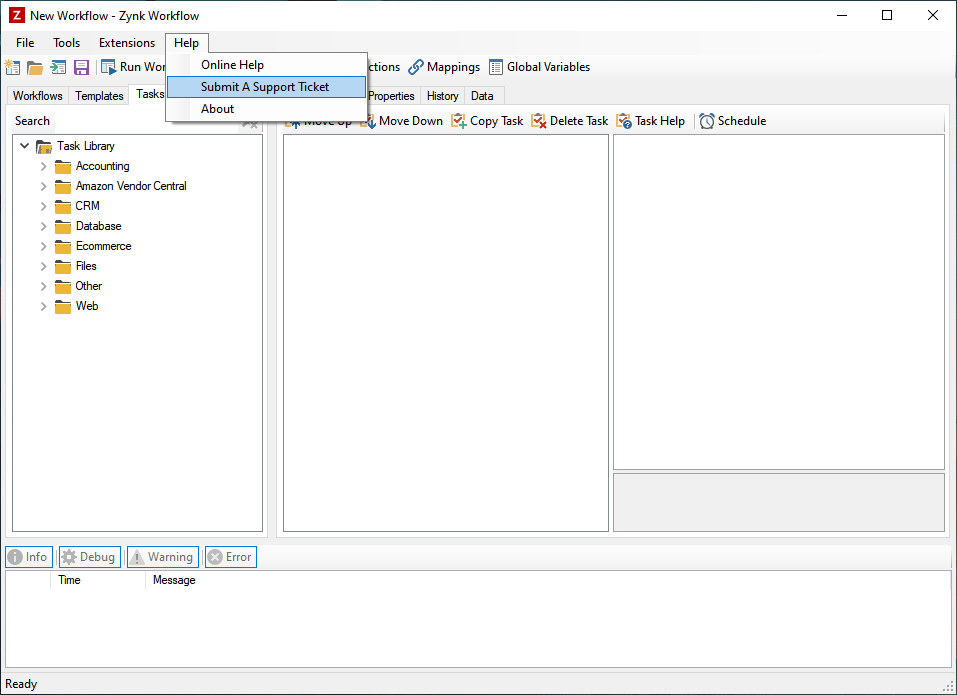
Workflow information can be submitted by opening the workflow in question, then clicking on Help -> Submit a Support Ticket form the menu bar
Version 2.23.0 and Above
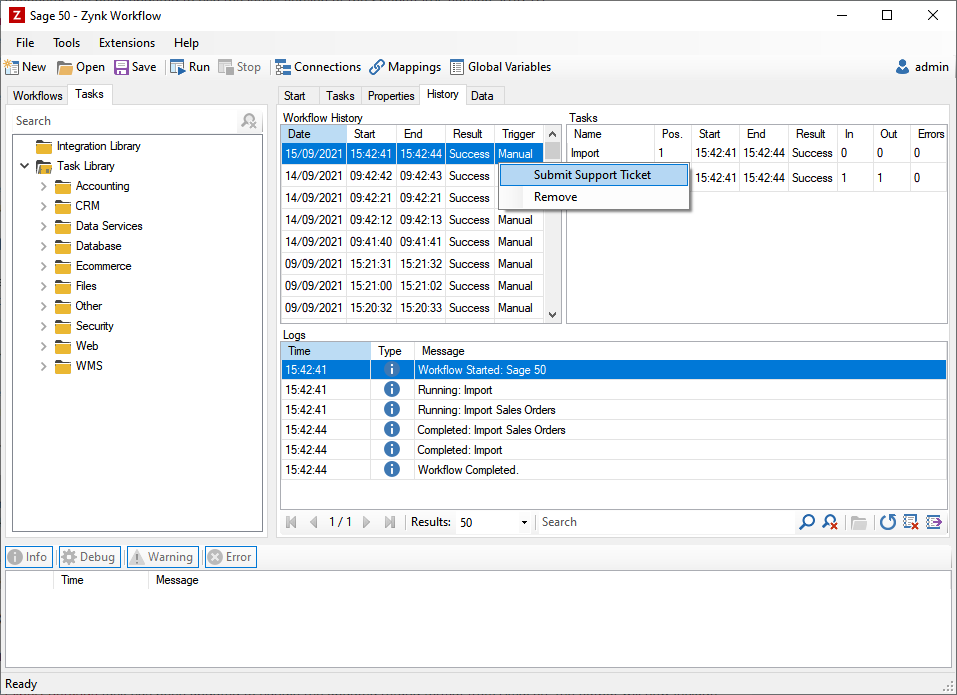
You can now submit a specific run of a Workflow from the History tab to ensure all relevant data and logs are included in the request.
To submit a request locate the run in the History tab, right click, and choose Submit Support Ticket.
This replaces the previous Help -> Submit Support Ticket option.
Workflow Templates
A workflow template is a series of pre-configured tasks that can be inserted into a workflow. you can also create your own workflow templates, for commonly used integration processes.
Using Workflow Templates
- Open the workflow you want to add the template to.
- Click on the Templates tab, and drag one of the templates into the task list. The task in the template will be added to your workflow.
- You can customise the tasks as required, just like any other task.
Creating a Workflow Template
- Create a workflow with the functionality you want to use as a template.
- Save the workflow.
- In the Workflows tab, right click on the workflow you have just saved, and select 'Save As Template'.