Connections
Connections are used in Zynk to store the connection details for the systems you integrate with. Any task which requires a connection to an external system will have a setting which allows you to set the connection to use.
You can create a single connection to each system/data source and use this throughout Zynk in multiple workflows and tasks. Any changes you make to a connection will be picked up automatically by any task that uses them.
The first time a connection is required in a workflow Zynk will open a connection session which is reused across all related tasks, at the end of the workflow Zynk will close any connections that have been opened.
For information on creating and updating connections, see Managing Connections.
Properties
All connections have the following properties:
Connection Type
This determines what system the connection is for. It controls which tasks can use the connection, for example a task from the Sage 50 connector will only accept connections of the Sage 50 type. When selecting the connection to use on a task, it will only show connections which can be used in conjunction with that task.
Name
The name of the connection. Each connection must have a unique name.
Default
Determines whether the connection will be selected automatically when adding new tasks to workflows. There can only be one default connection of each type.
Selecting The Connection On A Task
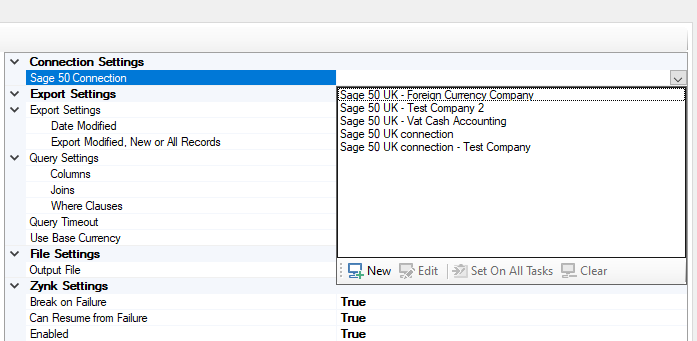
Tasks which require a connection to an external system will have a setting which allows you to choose the connection to use. An example is shown below.

- Click on the connection setting, and open the drop-down. The names of connections which can be used will be displayed.
- Double click on the connection you want the task use. If you want all tasks in the workflow to connect to the same data source, you can click the 'Set On All Tasks' button to apply the selected connection to all tasks.
- If you haven't already created a connection to the external system you are integrating with, you can do this using the 'New' button.
Managing Connections
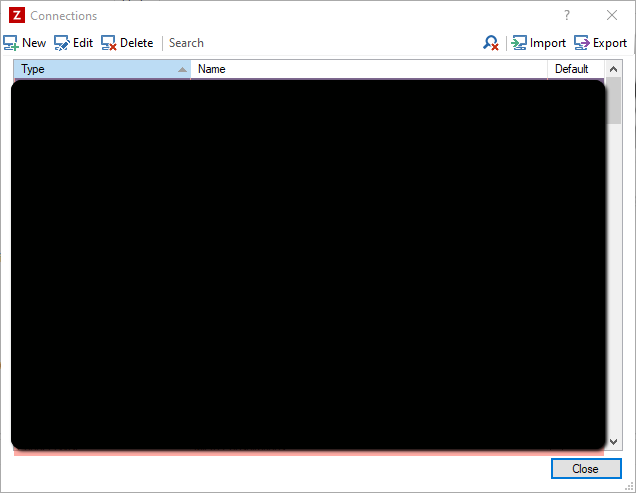
Connections are used in Zynk to store the connection details for the systems you integrate with. You can view and edit your connections by clicking on the 'Connections' button on the main toolbar. You will see a window like the one below:

Creating A New Connection
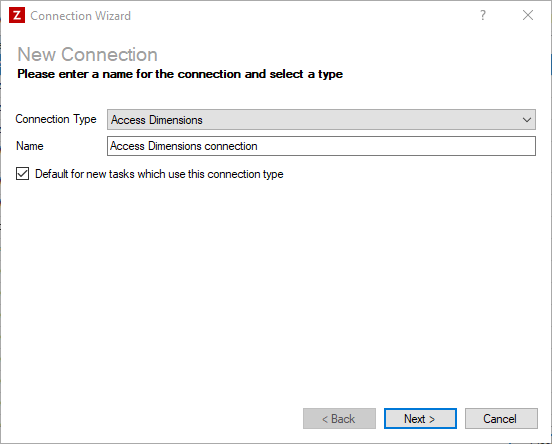
To create a new connection, click the 'New' button on the toolbar. You will then see a window like the one below:

- Select the system you want to create a connection to from the 'Connection Type' drop down.
- Enter a name for the connection. Note that each connection must have a unique name.
- Choose whether this connection should be the default for new tasks which connect to the chosen system. Note that you can only have one default per connection type. If a default connection already exists for the chosen connection type, this new connection will become the new default.
- Click the 'Next' button to proceed to the next page.
- Enter the requested details in the boxes provided. This will depend on the system you are connecting to, refer to the documentation for the connector for more information.
- Click the 'Finish' button to save the new connection.
Editing An Existing Connection
To edit an existing connection, select a connection from the list, and click the 'Edit' button. The process for editing a connection is the same as when creating a new connection, so just follow the instructions above. Note that it is not possible to change the connection type.
Deleting A Connection
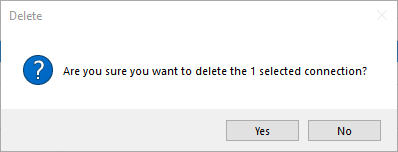
To delete an existing connection, select one or more connections from the list, and click the 'Delete' button. You will see a message like the one below asking you to confirm the delete operation.

Click 'Yes' to delete the connection.
Importing/Exporting Connections
You can import and export connections to and from files, this allows you to copy connections from one PC to another. Please note that when importing connections, it will overwrite any connections which already exist. If you need to move an entire integration from one PC to another, it is simpler to use the import/export workflow functions which handle the transfer of connections automatically. See Moving Workflows for details.
Export Connections
- Select one or more connections from the list of connections.
- Click the 'Export' button.
- Choose a file to export the connections to, and click the 'Ok' button.
Import Connections
- Click the 'Import' button.
- Select the file containing the connections to import.
- Click the 'Ok' button.