Caching in Zynk Workflow
Caching in Zynk Workflow is used to store frequently accessed data, such as lookup values or API responses, locally for faster retrieval.
This reduces the need for repetitive API calls or complex computations, improving performance and efficiency, especially in enterprise-level integrations.
By leveraging caching, workflows run faster, and resource usage is optimized, making it ideal for handling large-scale or complex data operations.
Managing Caches
The Cache Manager in Zynk Workflow provides a centralized interface for viewing and managing data stored in the caching database.
This functionality allows users to inspect cached data, edit existing records, and create or delete caches, streamlining data access for integrations.
Accessing the Cache Manager
To open the Cache Manager:
- Launch Zynk Workflow.
- Navigate to Tools > Caching from the menu bar.
- Alternatively, click the Caching button on the main toolbar.
Using the Cache Manager
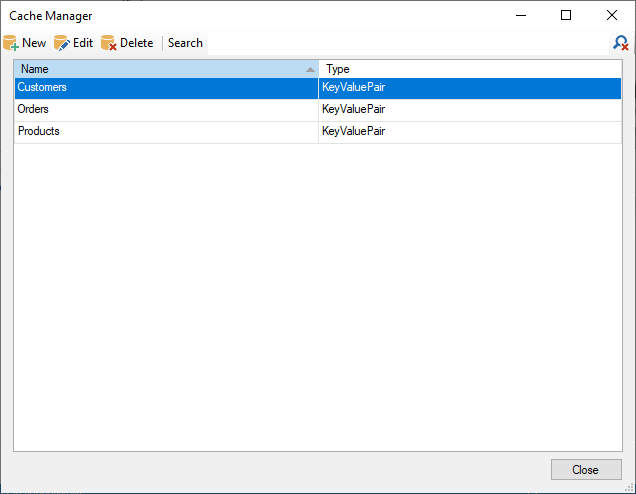
The Cache Manager displays a list of all available caches in the system, as shown in the first screenshot. Each cache entry includes:
- Name: The name of the cache.
- Type: The type of cache (e.g., KeyValuePair).
The toolbar at the top of the Cache Manager provides the following options:
- New: Create a new cache.
- Edit: Modify the selected cache.
- Delete: Remove the selected cache and its records.
- Search: Find specific caches.
Viewing Cache Contents
To view records within a cache:
- Select a cache from the list.
- Click Edit or double-click the cache name.
The Cache Viewer window, as shown in the screenshot, allows you to inspect the individual records within the selected cache. The viewer displays:
- Connection: The connection ID associated with the record (or an empty GUID if no connection is specified).
- Created: The date and time the record was created.
- Updated: The date and time the record was last updated.
- Cache Data: The data within cache records can vary. It typically consists of a 'Key' and a 'Value' column, as shown in the screenshot below. The 'Key' column represents the unique identifier for the record, such as a product code. 'Value' represents the data that is held in the cache, such as the inventory level for the product.
The records can be sorted by any of the columns, by clicking the header of the column.
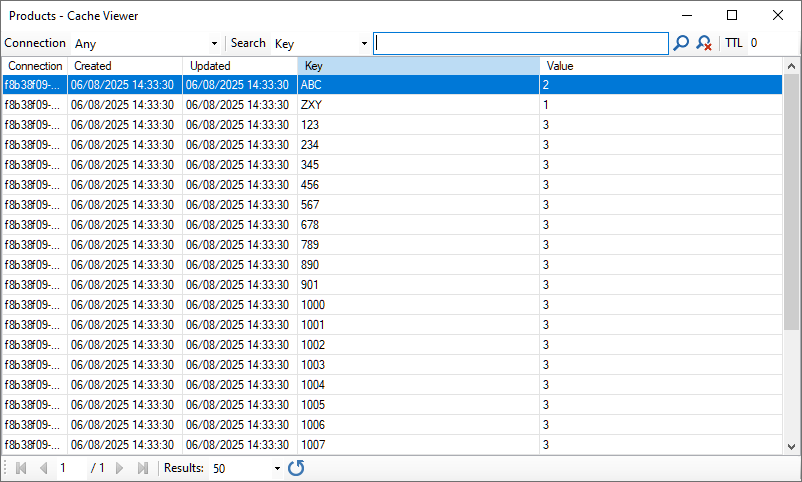
The main toolbar at the top of the window includes options for filtering the cache records:
- Connection: Select one of the connections listed in the drop-down menu to filter the records by connection. Choose 'Any' if you do not want to filter by connection.
- Search: Select a field to search from the drop-down menu, then enter some text in the search bar, then press enter. The search can be cleared by clicking the icon with the red 'x'.
- TTL (time to live): Enter a number of minutes into the box then press enter, to only display records that have been updated within the time frame specified. This can be used to filter out old records that may not be valid. Specifying zero will ensure all records are shown.
The navigation toolbar at the bottom of the window includes options for:
- Navigating through pages of results.
- Choosing how many records should be displayed per page.
- Refreshing the list of results.
See Also
- Importing Complex Records into Salesforce (V2) This task implements caching functionality to perform quicker lookups in Salesforce.
- Import Cache Records This task allows you to import records into the cache database based on your XML input data and a series of task settings.
- Caching Functions in XSLT The caching functionality has been added to our XSLT functions library. You can access data in the cache database from your mapping files.