Users
Zynk provides the ability to set up users within the program, allowing you to control which users are able to access specific elements of the program.
Logging In To Zynk
You must have a valid user account to be able to access Zynk. Whenever you open Zynk, you will see a screen like the one below requesting your username and password.
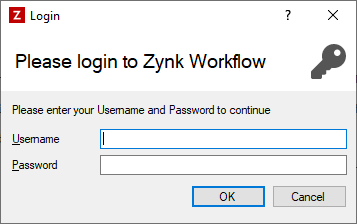
Enter you username and password into the boxes and click OK. If the details you have entered are valid, the application will load. If they are not, you will see an error message and you will be prompted to try and log in again.
Default User Accounts
When Zynk is first installed, two user accounts are created automatically:
| Username | Password | Access | Notes |
|---|---|---|---|
| admin | admin | Full access | This user cannot be removed or disabled |
| user | user | Read-only access | Only created when first installing Zynk v2025.2.2 or above |
Warning
We recommend you change your admin password on first use, and create individual user accounts with appropriate permissions for daily use.
Managing Your User Account
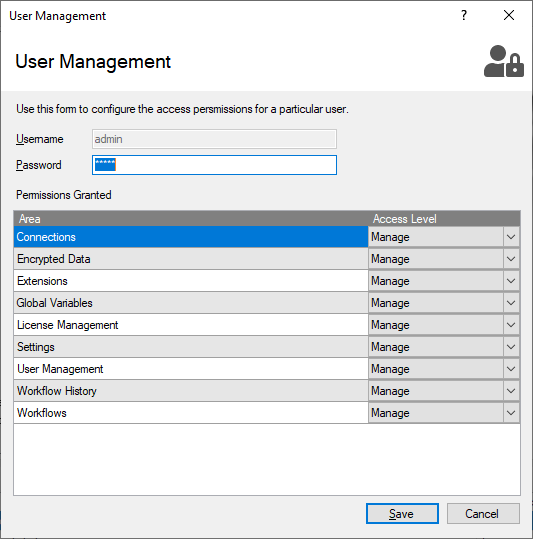
After logging in to Zynk, you can manage your user account by clicking the button on the far right of the main toolbar which shows your username. This will open the user management screen, as shown below.
Note
It is not possible to change your username. The only way to do this is to delete your existing user account and then set up a new one. For more information on how to do this, refer to please refer to User Management.
Changing Your Password
Simply enter your new password into the password box, then click the Save button to save the new password.
User Permissions
Your user permissions are displayed in the table on the user management screen. The table lists all areas of Zynk, and the level of access you have to that area.
If your user has 'Manage' access to the 'User Management' area, it will be possible for you to change your access level to any area of Zynk. You can do this by selecting your required level of access from the drop down menus next to each area. Once you are done, click the Save button to save the changes.
For more information about the different areas of Zynk and access levels, please refer to Permissions.
Forgotten Usernames/Passwords
If you have forgotten your Zynk username and/or password, you will need to contact someone within your organisation who has user management access in Zynk. They will be able to find your username and change your password.
If nobody is able to log in to Zynk with an account that has user management access, please contact Zynk Support.
Managing Users
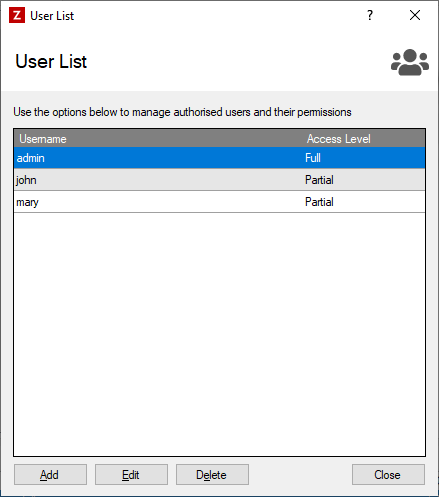
The user list screen in Zynk can be used to create, update and remove users from the system. After Logging in to Zynk, you can access the user list by going Manage > Users. You will see a screen like the one below.
Note
If the user you are logged in with does not have view or manage access to the user management area, you will only be able to see your own user account in the user list. Any other users will not be visible.
Creating A New User Account
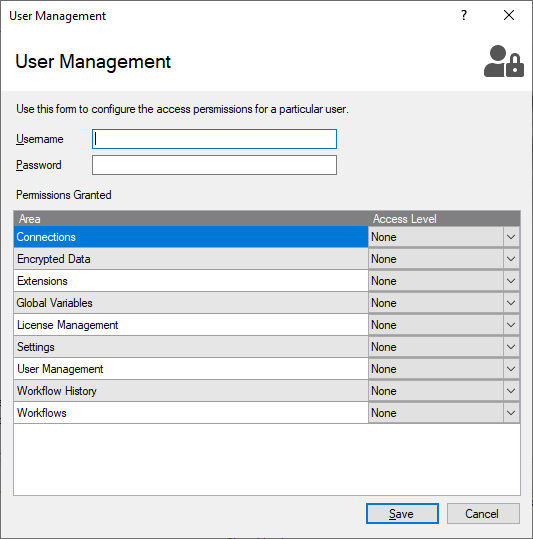
You can create new user accounts by clicking the 'Add' button on the user list screen. This will open the user management screen, as shown below.
Note
If the user you are logged in with does not have manage access to the user management area, you will not be able to add new users.
Follow the steps below to set up the new user:
- Enter a username into the Username box.
- Enter a password into the password box.
- Set the permissions for the user, by selecting the required access level from the drop down menus next to each area shown in the permissions list. For detailed information about each area of Zynk, and the effects each access level has upon it, see the Permissions section below.
- Click the 'Save' button to save the new user.
Making Changes To An Existing User Account
You can manage existing user accounts by double clicking on any of the users displayed in the user list. This will open the user management screen, as shown below.
Note
If the user you are logged in with does not have manage access to the user management area, you will not be able to make any changes.
Note
It is not possible to change usernames. The only way to do this is to delete the existing user account and then set up a new one.
Changing The Password
Simply enter your new password into the password box, then click the Save button to save the new password.
Changing Permissions
The user's permissions are displayed in the permissions table on the user management screen. The table lists all areas of Zynk, and the level of access the user has to that area.
To change the access level to a particular area of Zynk, select the required access level from the drop down menus next to each area. Once you are done, click the Save button to save the changes.
For detailed information about each area of Zynk, and the effects each access level has upon it, see the Permissions section below.
Removing An Existing User Account
To revoke all access to Zynk for a particular user, you will need to delete their user account. You can do this by following the steps below.
- Click on the user you want to delete to select it.
- Click the 'Delete' button at the bottom of the form.
- When prompted, confirm that you want to delete the user by clicking the 'Yes' button.
Note
If the user you are logged in with does not have manage access to the user management area, you will not be able to delete users.
Note
It is not possible to delete the user account you are currently logged in with.
Permissions
Each area of Zynk is listed table below, along with each access level and the affect it will have on the user.
Connections
- None - The user can't access the connection manager, and is unable to view, create, edit, import or export connections
- View - The user can access the connection manager, and can view connections. They can't create, edit, import or export connections
- Manage - The user can access the connection manager, and can view, create, edit, import and export connections
Encrypted Data
- None - The user can't view any encrypted data, and can't enable or disable encryption
- View - The user can view any encrypted data, but can't enable or disable encryption
- Manage - The user can view any encrypted data, and enable or disable encryption
Extensions
- None - The user can't access the extension manager, and can't install or uninstall extensions. They can use any extensions already installed
- View - The user can access the extension manager, but can't install or uninstall extensions. They can use any extensions already installed
- Manage - The user can access the extension manager, and can install or uninstall extensions. They can use any extensions already installed
Global Variables
- None - The user can't access the global variables screen, and can't view, create or update any global variables
- View - The user can access the global variables screen, and can view global variables. They can't create or update any global variables
- Manage - The user can access the global variables screen, and can view, create and update any global variables
License Agreement
- None - The user can't access the license manager, and can't view, refresh or enter a new license key
- View - The user can access the license manager, and can view the existing license. They can't refresh or enter a new license key
- Manage - The user can access the license manager, and can view, refresh or enter a new license key
Settings
- None - The user can't access the settings screen, and can't make any changes
- View - The user can access the settings screen, but can't make any changes
- Manage - The user can access the settings screen, and can make changes
User Management
- None - The user can only see their own user account. They can't add, edit or remove other users. The only change they can make to their account is to change the password
- View - The user can view all user accounts. They can't add, edit or remove other users. The only change they can make to their account is to change the password
- Manage - The user can view all user accounts. They can add, edit and remove other users. They can change their own password and permissions
Workflow History
- None - The user can't access workflow history. They can't remove entries or perform housekeeping
- View - The user can access workflow history, but they can't remove entries or perform housekeeping
- Manage - The user can access workflow history, and can remove entries and perform housekeeping
Workflows
- None - The user can't open, edit or create new workflows. They can see the name of existing workflows and run them
- View - The user can open existing workflows, but can't edit them or create new workflows. They can run workflows
- Manage - The user can open existing workflows, and can edit them. They can create new workflows, and can run workflows