Connecting to Sage 200 Online
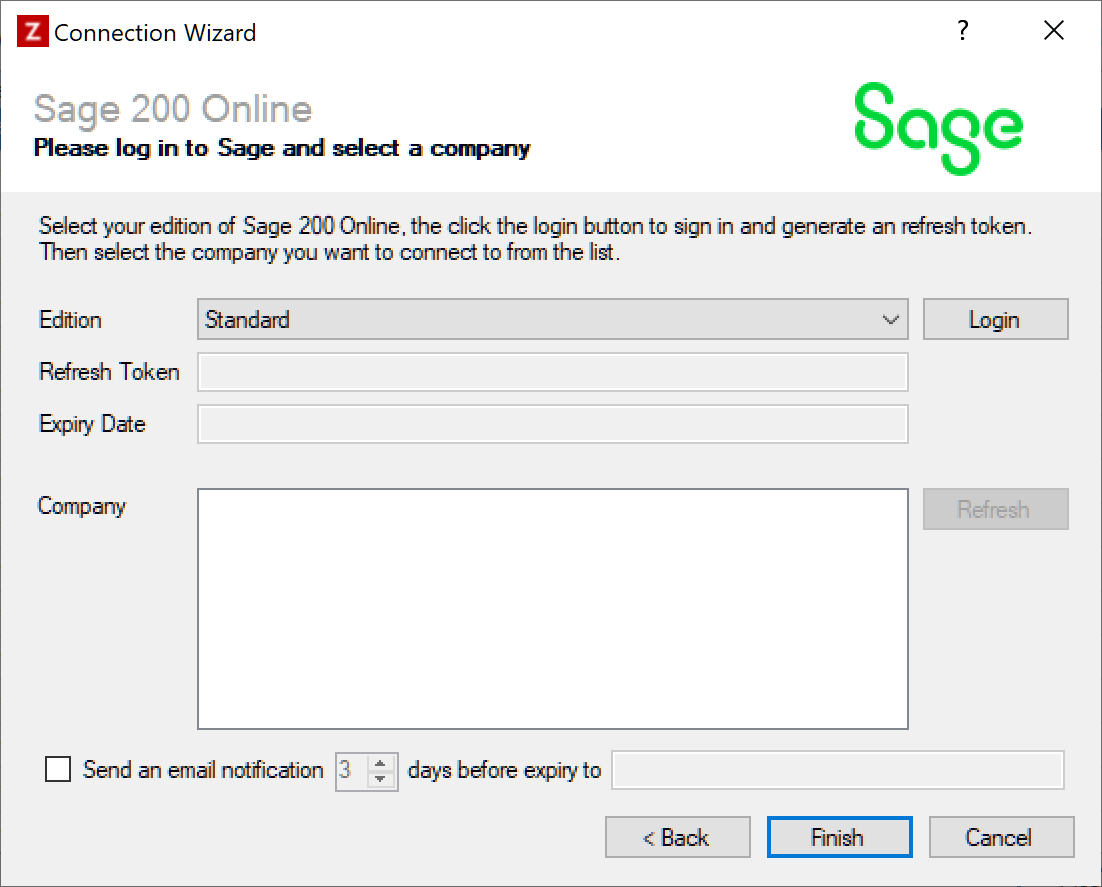
All of the tasks in the Sage 200 Online connector require a connection to a Sage 200 Online company, so you will need to create a connection with the type 'Sage 200 Online'. See Managing Connections for instructions on creating a new connection. You will see a screen like the one below, requesting your Sage 200 Online details:

Enter your Sage 200 details as described below, then click 'Finish' to create the connection.
Settings
Edition
Required
Select the edition of Sage 200 Online you are connecting to. The available options are:
- Standard
- Extra
Refresh Token
Required
You can generate a token which allows access to Sage 200 Online by following the steps below. This allows Zynk to access your Sage data.
- Click the 'Login' button, which will take you to the Sage ID login page.
- Enter your Sage ID username and password, then click 'Sign In'.
- Sage will ask you to confirm whether you give Zynk permission to access your data, click 'Allow' to generate the access token.
Expiry Date
Required
Once you have generated a refresh token, the date it will expire will be shown here. This will be 3 months from the date you logged into Sage to generate the token. You may wish to configure an expiry notification email using the settings described below, to receive a notification before the connection is due to expire.
Important
If Zynk tries to connect to Sage 200 Online after the expiry date, you will see an error stating that the refresh token has expired. When this happens, simply edit your Sage 200 Online connection, and repeat the steps above to generate a new access token.
Company
Required
Once you have an access token, the companies you have access to will be listed here. Select the one you want Zynk to connect to. You can update the company list by clicking the 'Refresh' button.
Expiry Notification Settings
Optional
Tick this box if you would like to receive an email notification shortly before the connection is due to expire. The following additional settings can be configured:
- You can change how much notice is given by altering the number of days. The default is 3, but you can specify any value between 1 and 10.
- The email address you would like the email to be sent to must be specified in the box at the end. You can also provide multiple email addresses to send the notification to, by separating them with commas.
When this option is enabled, Zynk will check the expiry date of the connection at the point of startup and will send a notification email if it falls within the number of days specified. The email will be sent using the SMTP details configured in Tools > Options > SMTP.