Connecting to ACT!
All of the tasks in the ACT! connector require a Connection to ACT!. To find out more, see Managing Connections.
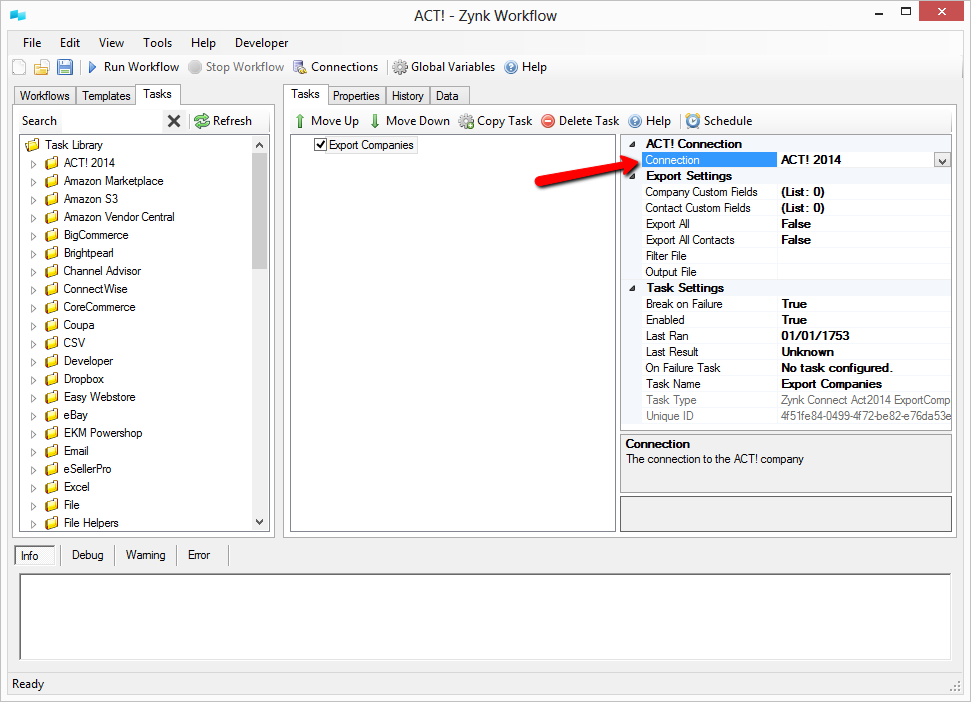
You must specify the ACT! Connection you would like to use on each of the ACT! tasks. To specify the connection, select the appropriate entry from the dropdown as seen in the screenshot below. Alternatively, once you have set up the ACT! connection that you would like to use, you can make this the default for any tasks which require this connection type, which means that you don't need to select the connection for every new task that you add to the Workflow.

Alternatively, you can set up a new connection from here or edit the details of an existing connection.
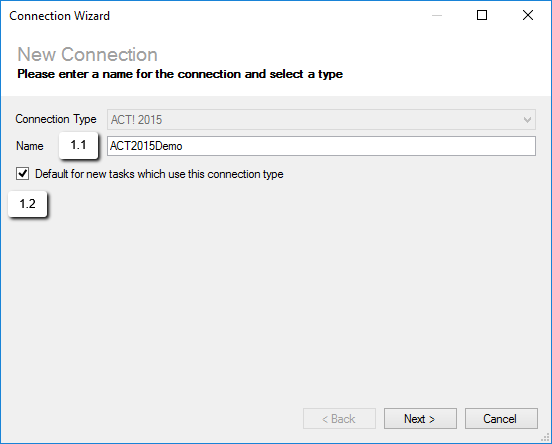
When editing or setting up a new connection, you must specify a Name as seen in the screenshot below (1.1), this should be some identifying name for this particular connection. The check box seen in the screenshot below (1.2) is to mark the connection as the default for that connection type (ACT!).

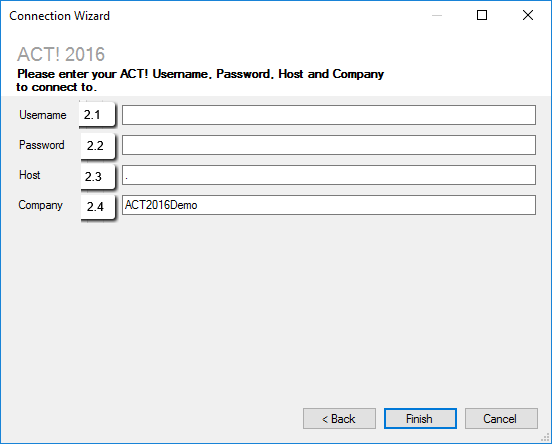
You must then provide the Username (2.1) and Password (2.2) you would like to use to connect up to the ACT! data, the ACT! server hosting the data (2.3) and the name of the ACT! database (2.4) you would like to connect to.

Connection Settings
Username
Required
The username to use when connecting up to ACT!. This must be an active user set up in ACT! with the relevant permissions needed for the tasks that will be performed by Zynk (2.1).
Password
Required
The password for the provided ACT! user (2.2).
Host
Required
The name of the ACT! server where the ACT! data is hosted. If this is on the local computer where Zynk is running, leave as the default '.' (2.3).
Name
Required
The name of the ACT! database you are connecting to (2.4).