Using the Auto Mapper
In this tutorial, we take an in-depth look at using the Auto Mapper task to use Zynk's prebuilt mappings between our most popular systems. If there are any mappings you require but that are not available here, you can create them yourself using the XSLT Transform task and following our Create an XSLT File tutorial.
Alternatively, if there are any custom mappings you'd like us to write for you, please send an email to [email protected] and we can look at creating this on your behalf.
Configuring the Mapping
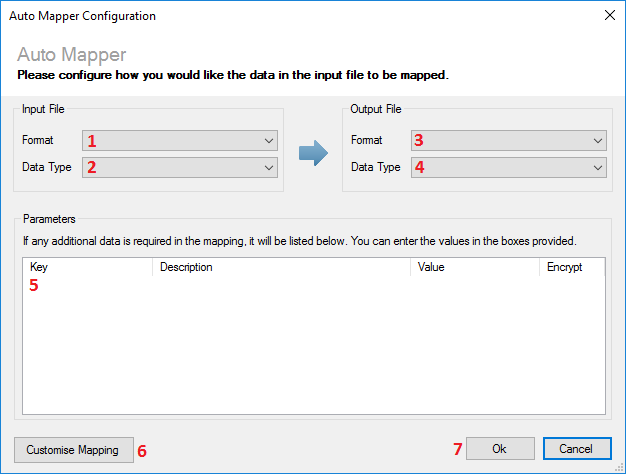
To configure the Auto Mapper, click on the ellipsis (...) button on the 'Mapping' setting. You will then see a window like the one below.

- Select the format of the input file from the drop down menu. For example, if you want to convert orders downloaded from Amazon, you should choose 'Amazon' as the input format.
- Select the data type of the input file from the drop down menu. For example, if you want to convert orders downloaded from Amazon, you should choose 'Orders' as the data type.
- Select the format you would like to map the input file to. For example, if you would like to output orders in Zynk's own XML format (Connect XML), you should choose 'Zynk XML' as the output file format.
- Select the data type you would like to map the input file to. For example, if you would like to output orders in Zynk's own XML format (Connect XML), you should choose 'Orders' as the output file data type.
- Once you have completed the first four steps, any parameters that are required to perform the mapping will be listed. If there are any parameters, you should enter an appropriate value for them in the 'Value' column. For example, if one of the parameters was 'Currency', you should enter the currency any monetary data is in. You also have the option to encrypt any sensitive data stored in parameters, by checking the 'Encrypt' box.
- If necessary, you can customise the way the data is mapped by clicking the 'Customise Mapping' button. More details about how to customise the mapping can be found below.
- Once you are finished setting up the mapping, click the 'Ok' button.
Customising the Mapping
The mapping provided can be customised to match your specific requirements. You should only use this option if you have a good knowledge of using XSLT to transform XML data, tutorials for writing XSL transforms can be found at W3 Schools. Please note that the task only supports XSLT 1.0. Zynk Software cannot provide support for mappings which have been customised.
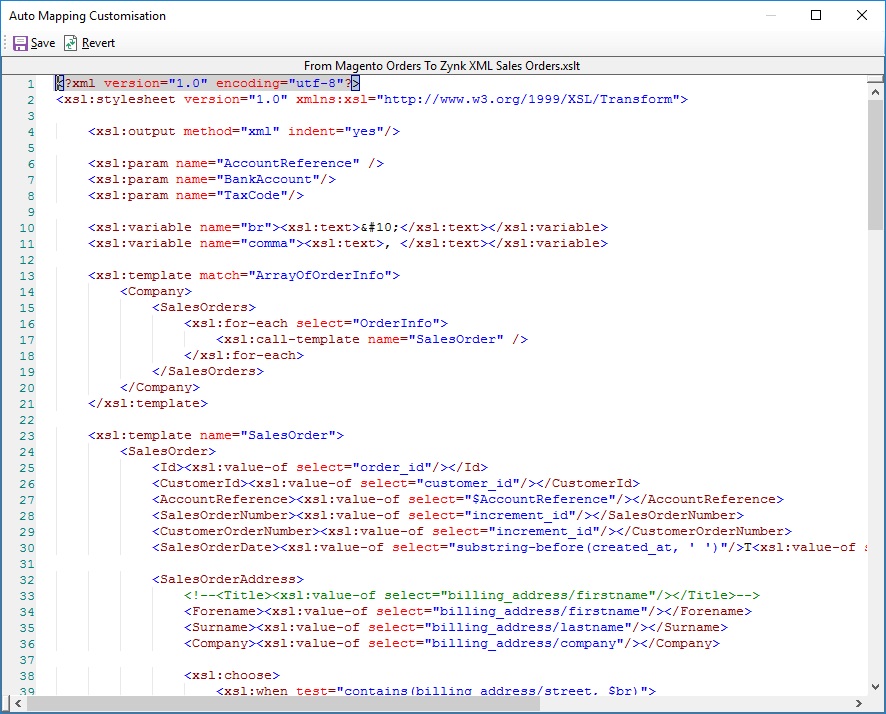
To customise the mapping, click the 'Customise Mapping' button, and you will see a window like the one below.

The XSLT used in the mapping is displayed, and can be edited to match your specific requirements. Once you are finished modifying the XSLT, click the 'Save' button to save the changes. You can also use the 'Revert' button to revert back to the original XSLT. This can be useful if you have made a change to an XSLT that has causes an error to occur when the Auto Mapper task runs.