Using the Query Designer
The Query Designer provides a visual, point and click user interface for building SQL queries. It is available on most tasks which require an SQL query, see below for a list of the tasks it can be used on.
Accessing the Query Designer
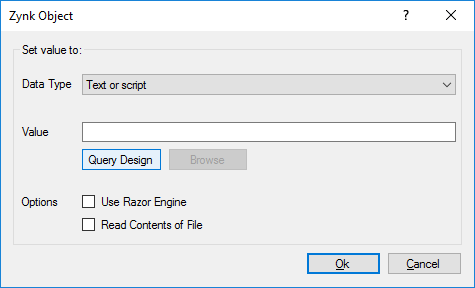
The Query Designer can be accessed from within a supported task's settings. In this example, the MS SQL Select task is being used. Click the 'Query' setting, then the ellipsis (...) button that appears next to it.

Click the 'Query Design' button to launch the Query Designer. Please note that this button will only appear on task settings which support the Query Designer. You must select a connection in the task settings before you can use the Query Designer.

Guide to the Query Designer
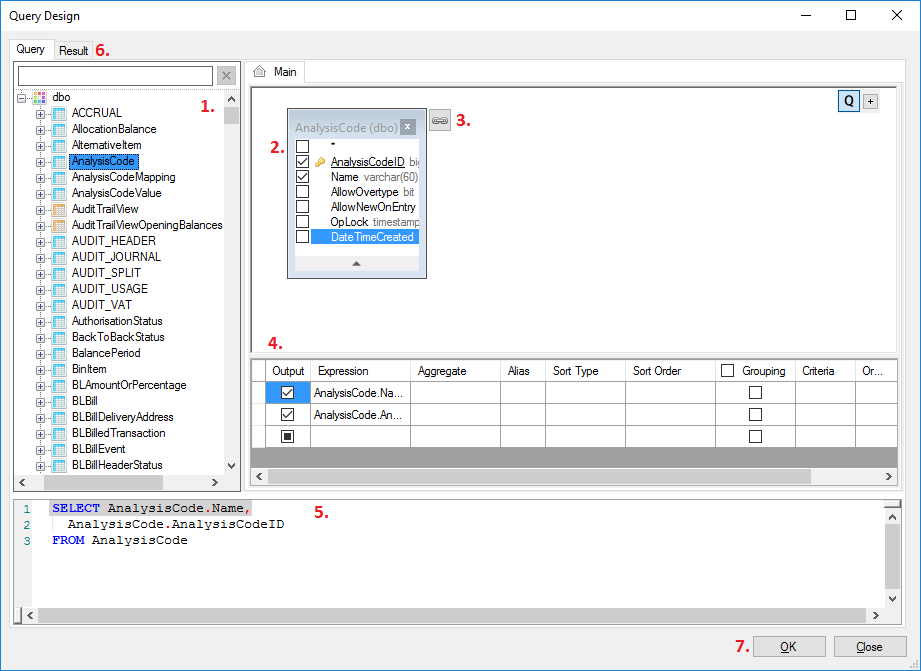
After launching the Query Designer, you will see a window like the one shown below.

- Click and drag a table from the right into the centre to add it to the query.
- Use the check boxes to chose which columns the query should select from the table.
- Click this button to add a related table to the query. The list of related tables will appear, click the one you want to add. You can chose which columns to select from the related table in the same way as step 2.
- Configure any aggregate functions, aliases, sorting, grouping or criteria for each column here.
- You can manually edit the SQL query generated by the designer here, if required.
- Switch to the Results tab to check what data the query returns.
- Click OK once you have finished editing the query.
Supported Tasks
The Query Designer is available on the following tasks: